
Water Heater Installation: A Comprehensive Guide for Homeowners
Installing a water heater is a significant home improvement project that can save you thousands of dollars if done correctly. Whether you’re replacing an aging unit or upgrading to a more efficient model, understanding the installation process is essential for both DIY enthusiasts and those planning to hire professionals. This comprehensive guide covers everything you need to know about water heater installation, from preparation and materials to the actual installation steps and troubleshooting tips.
Types of Water Heaters and Installation Considerations
Before beginning any installation project, it’s important to understand the different types of water heaters available and how they affect your installation process. Tank water heaters store hot water in a large insulated tank, while tankless water heaters heat water on-demand without storing it. Each type has distinct installation requirements, costs, and benefits that should be carefully considered before making your purchase decision.
Traditional tank water heaters are the most common choice for residential applications due to their lower upfront costs and straightforward installation. Tankless water heaters, on the other hand, offer greater energy efficiency and endless hot water but typically require more complex installation procedures and higher initial investment. Understanding these differences will help you prepare properly for your specific installation project.
Essential Tools and Materials for Water Heater Installation
Proper preparation is crucial for a successful water heater installation. Before starting any work, gather all necessary tools and materials to ensure the project runs smoothly without unexpected delays.
Required Tools
The following tools are essential for most water heater installations:
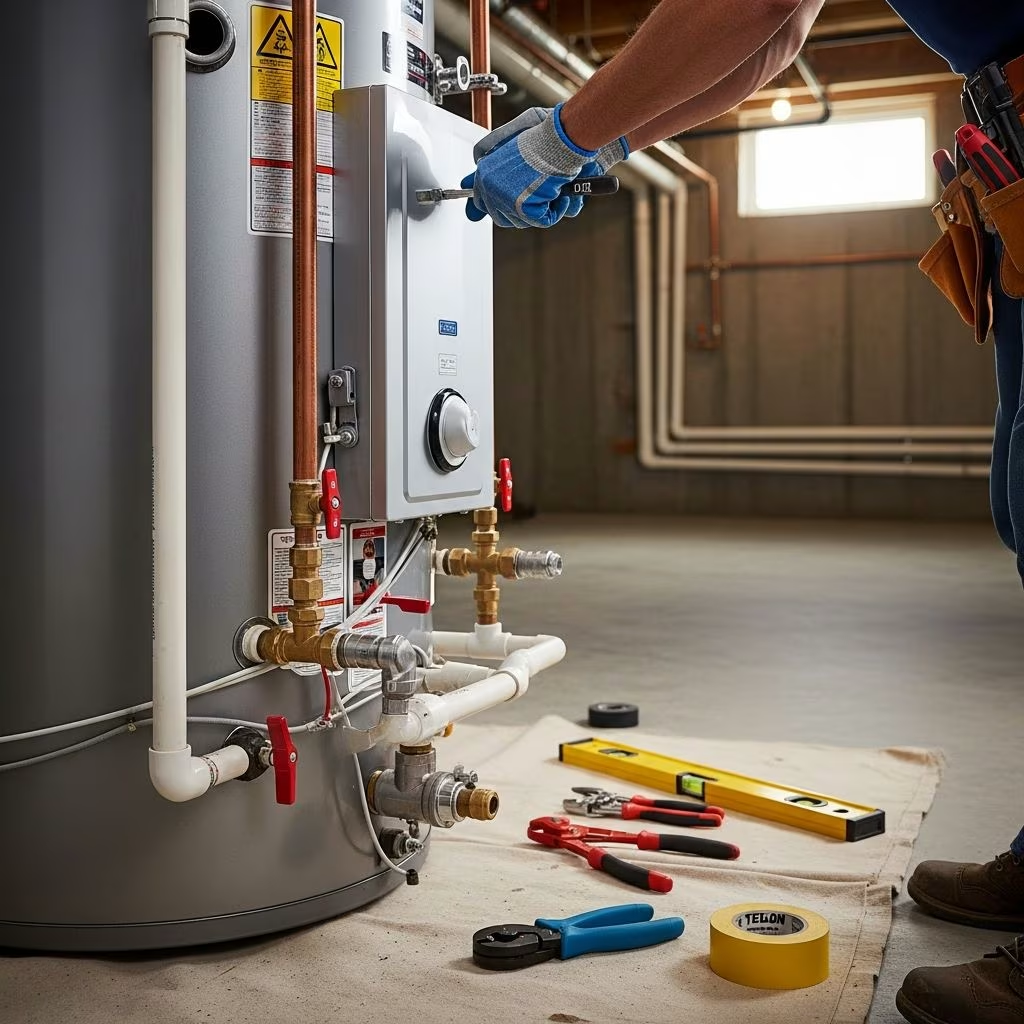
– Pipe wrench or adjustable wrench for disconnecting and connecting pipes- Screwdrivers (both Phillips and flathead) for electrical connections- Wire strippers for electrical work on electric water heaters- Voltage tester to verify power has been shut off- Teflon tape for sealing threaded connections- Pipe joint compound to prevent leaks- Flashlight or headlamp for visibility in confined spaces- Hand truck or dolly for moving heavy units- Bucket or shop towels for containing water spillage- Garden hose for draining the old water heater tank
Required Materials
In addition to tools, you’ll need specific materials for installation:
– Dielectric unions to prevent corrosion between different metal types- Flexible water connectors or copper pipes with compression fittings- Pressure relief valve and discharge pipe- Water heater straps to secure the unit firmly in place- Expansion tank if required by local building codes- Heat trap fittings to improve energy efficiency- Metal drain pan (at least 2 inches wider than the unit)- Pipe insulation for exposed hot water lines
Safety Precautions Before Installation
Water heater installation involves working with electricity, gas, and pressurized water systems. Taking proper safety precautions protects both you and your home from potential hazards.
Electrical Safety
Turn off the main power supply to the water heater at the circuit breaker before starting any work. Use a voltage tester to verify that power has been completely shut off. For electric water heaters, test both the hot and neutral wires to ensure the circuit is de-energized. Never work on electrical connections while the unit is powered.
Water Supply Safety
Shut off the main water valve leading to the water heater to prevent flooding during the installation process. Additionally, open the nearest hot water faucet to release pressure from the system. This step is critical to prevent water from spraying during disconnection of old lines.
Personal Protective Equipment
Wear appropriate safety gear including work gloves, safety glasses, and steel-toed boots to protect against burns and injuries. Clear the work area of any items that might cause trips or falls, especially when moving the heavy old unit.
Preparing Your Installation Area
Proper preparation of your installation space ensures efficiency and safety throughout the process. Start by clearing the area around your existing water heater and gathering all your tools and materials within easy reach.
Placement and Leveling
Install a metal drain pan beneath the new water heater to catch any water leaks. The drain pan should be at least 2 inches wider in diameter than your unit and no deeper than 1.75 inches. This pan protects your floor from water damage and makes maintenance easier. Place the water heater in the drain pan and ensure it sits level, as an improperly leveled unit can cause problems with sediment buildup and reduce efficiency.
Removing the Old Water Heater
Before installing your new water heater, you must properly remove and dispose of the old unit. This process requires careful attention to detail to avoid water damage and ensure the installation area is ready for the new unit.
Draining the Tank
Connect a garden hose to the drain valve at the bottom of the tank and place the other end in a floor drain or outside area. Open the drain valve and allow the tank to empty completely. For faster drainage, open the nearest hot water faucet inside your home. This action helps break the vacuum seal and allows water to flow out more quickly. Take your time with this step, as a full tank can contain 40-50 gallons of water.
Disconnecting Lines and Components
Using a pipe wrench, carefully disconnect the water lines from the top of the old heater. Remove the vent pipe from gas water heaters and disconnect all power connections or gas lines using appropriate tools. Check for any mounting straps or brackets holding the tank in place and remove them. Take photos of the old setup as reference points for connecting the new unit, as these images will be invaluable when making connections on the new water heater.
Removing the Old Unit
Slide the old unit away from the wall carefully and use a hand truck to move the empty tank outside. Clean the installation area thoroughly to remove any debris, mineral deposits, or rust. Mark all connection points on the wall and floor to ensure proper placement of the new unit.
Installing Your New Water Heater
With the old water heater removed and your area prepared, you can begin the installation of your new unit. This process involves placing, connecting, and testing multiple systems simultaneously.
Placement and Heat Trap Installation
Position your new water heater in the drain pan and ensure it’s level. Install heat trap fittings on both the hot and cold water inlet connections. These fittings include check valves that improve energy efficiency by preventing hot water from rising up the cold water line when the heater is inactive, reducing heat loss and lowering your energy bills.
Water Line Connections
Connect the cold water line to the inlet port using flexible copper pipes and compression fittings. This flexible connection reduces vibration and prevents stress on rigid pipes. Attach the hot water outlet pipe to the top of the tank with threaded fittings. Place dielectric unions between different metal types to stop corrosion that can occur when copper and steel pipes connect directly.
Pressure Relief System
Install a pressure relief valve on the tank’s designated port to prevent excess pressure buildup. Attach a discharge pipe with 3/4-inch interior diameter that slopes downward to drain properly. The pipe should end between 1 and 6 inches from a drain or an outside destination. This safety system is crucial for preventing dangerous pressure buildup inside the tank.
Securing Connections
Apply pipe joint compound to all threaded connections to prevent leaks. Secure all pipe connections tightly but avoid over-tightening, which can strip threads or crack fittings. Test all connections with a pressure gauge to confirm proper sealing. Install an expansion tank if required by your local building codes, which accommodates the expansion of water as it heats.
Gas Water Heater Specific Installation Steps
If you’re installing a gas water heater, additional steps are necessary to ensure safe and proper operation of the gas supply system.
Gas Line Installation
Installation kits may come with flexible gas connectors for easy installation. Hook up gas lines to your water heater following the manufacturer’s instructions carefully. If you’re uncertain about working with gas lines, consult a professional, as improper gas connections can create serious safety hazards.
Testing for Gas Leaks
Turn on the gas supply and check all gas fittings for leaks by applying dish soap or bubble solution to the connectors. If you see bubbling, this indicates a leak that must be fixed before operating the unit. Never use an open flame to check for leaks, as this is extremely dangerous.
Igniting the Pilot Light
Turn the gas supply on and use the control knob or a small flame to ignite the pilot light according to manufacturer instructions. When it’s lit, the status light on your water heater should start blinking. Adjust the thermostat to your desired temperature, typically 120°F is recommended for safety and efficiency.
Electric Water Heater Installation
Electric water heaters require proper electrical connections to function safely and efficiently. This work should be performed carefully, and you may choose to hire a licensed electrician if you lack electrical experience.
Electrical Connections
Run the electrical supply through proper conduit to the junction box on the water heater. Link the ground wire (typically green) to the green screw inside the junction box. Connect the hot and neutral wires to the appropriate terminals. Check voltage requirements match your home’s electrical system to prevent damage to the heating elements.
Securing the Unit
Mount a shut-off valve on the cold water inlet line for maintenance needs. Install water heater straps to secure the unit firmly in place, as required by most local building codes. These straps prevent the heater from tipping over during earthquakes or if struck accidentally.
Final Testing and Startup Procedures
Before using your new water heater, perform several important tests to ensure everything is functioning correctly and safely.
Filling and Purging Air
Turn on the water supply slowly to allow the tank to fill. Open the nearest hot water faucet and let water flow for several minutes to purge all air from the lines and tank. This step is essential because air in the lines can cause sputtering, reduced water flow, and potential damage to heating elements.
Checking for Leaks
Carefully inspect all water connections while water is running to check for any leaks. Examine the area around each fitting, the drain valve, and the pressure relief valve discharge pipe. Small drips should be tightened, but significant leaks indicate a connection problem that must be resolved before continuing.
Temperature Setting
Set the thermostat to your desired temperature. A setting of 120°F is recommended by most experts for the best balance between comfort, safety, and energy efficiency. Higher temperatures increase scalding risk, while lower temperatures may not provide sufficient hot water.
When to Call a Professional
While many homeowners can successfully install water heaters, certain situations warrant professional assistance. Call a licensed plumber or HVAC technician if you:
– Lack experience with plumbing or electrical work- Are uncertain about local building codes and permit requirements- Have complex gas line configurations or connections- Experience persistent leaks or pressure problems- Need to modify existing plumbing or electrical systems- Are installing a tankless water heater, which often requires venting modifications- Encounter unusual circumstances or complications during installation
Common Water Heater Installation Mistakes to Avoid
Understanding common mistakes helps prevent costly errors and safety issues during installation. Never skip the drain pan installation, as it’s crucial for protecting your floor from water damage. Don’t forget dielectric unions when connecting different metal types, as this causes corrosion and reduces the lifespan of your connections. Avoid over-tightening connections, which can crack fittings and cause leaks. Never ignore local building codes and permit requirements, which exist to ensure safety and proper installation. Finally, don’t attempt gas line work if you lack experience, as improper connections can create serious safety hazards.
Energy Efficiency Tips for New Water Heater Installation
Maximize the efficiency of your new water heater with these practical tips. Install pipe insulation on exposed hot water lines to reduce heat loss. Use heat trap fittings to prevent thermosiphoning. Consider installing an expansion tank to improve system efficiency. Insulate the tank itself with a water heater blanket if your unit doesn’t have adequate factory insulation. These measures can reduce your energy costs by 10-15% annually.
Frequently Asked Questions
Q: Do I need a permit to install a water heater?
A: Yes, most municipalities require permits for water heater installation. Permits ensure the installation meets local building codes and safety standards. Contact your local building department to determine specific requirements in your area.
Q: How long does water heater installation typically take?
A: Professional installation usually takes 2-4 hours for a tank water heater. Tankless installations may take longer, potentially 4-8 hours, due to more complex venting and gas line requirements. DIY installation may take longer depending on your experience level.
Q: What size water heater do I need?
A: The appropriate size depends on your household’s hot water usage. A family of four typically needs a 40-50 gallon tank water heater. Tankless models are sized by flow rate in gallons per minute. Your previous water heater size is a good starting point for determining the right capacity.
Q: Can I install a water heater in an attic or crawl space?
A: Water heaters can be installed in these spaces, but adequate drainage and ventilation must be provided. Most building codes require a drain pan that’s piped to an appropriate drain. Consult local codes and consider hiring a professional for unusual installation locations.
Q: How often should I maintain my new water heater?
A: Drain and flush your water heater annually to remove sediment buildup. Check the pressure relief valve operation yearly. Have a professional inspect the unit every 2-3 years. Regular maintenance extends your water heater’s lifespan and maintains efficiency.
Q: What should I do if my water heater is leaking after installation?
A: Small drips at connection points can often be fixed by tightening the fitting slightly. If tightening doesn’t work, drain the tank and reconnect the fitting using Teflon tape and pipe joint compound. Leaks from the tank itself indicate a defective unit requiring replacement. Consult a professional if you’re unable to identify the leak source.
References
- Ultimate Guide To Efficient Water Heater Installation Process — Twin City Heating and Air. 2024. https://twincityheatingandair.com/minneapolis-mn-heating-and-air-conditioning-blog/ultimate-guide-to-efficient-water-heater-installation-process
- Water Heater Installation Guide — A.O. Smith Corporation. 2024. https://www.hotwater.com/info-center/water-heater-installation-guide.html
- Executing Startup Procedures — 7th Element HVAC. 2024. https://www.7thelementhvac.com/essential-guide-to-water-heater-installation-in-eagle-idaho/
- Water Heater Installation DFW: Safety, Costs & Expert Guide — CR Plumbing DFW. 2024. https://www.crplumbingdfw.com/water-heater-installation-dfw-safety-costs-expert-guide/
- Tankless Water Heater Installation and Replacement — Money.com. 2024. https://money.com/installing-a-water-heater/
This article is general information, not personal financial advice. Consider your own situation, or speak with a licensed adviser, before acting on it.