

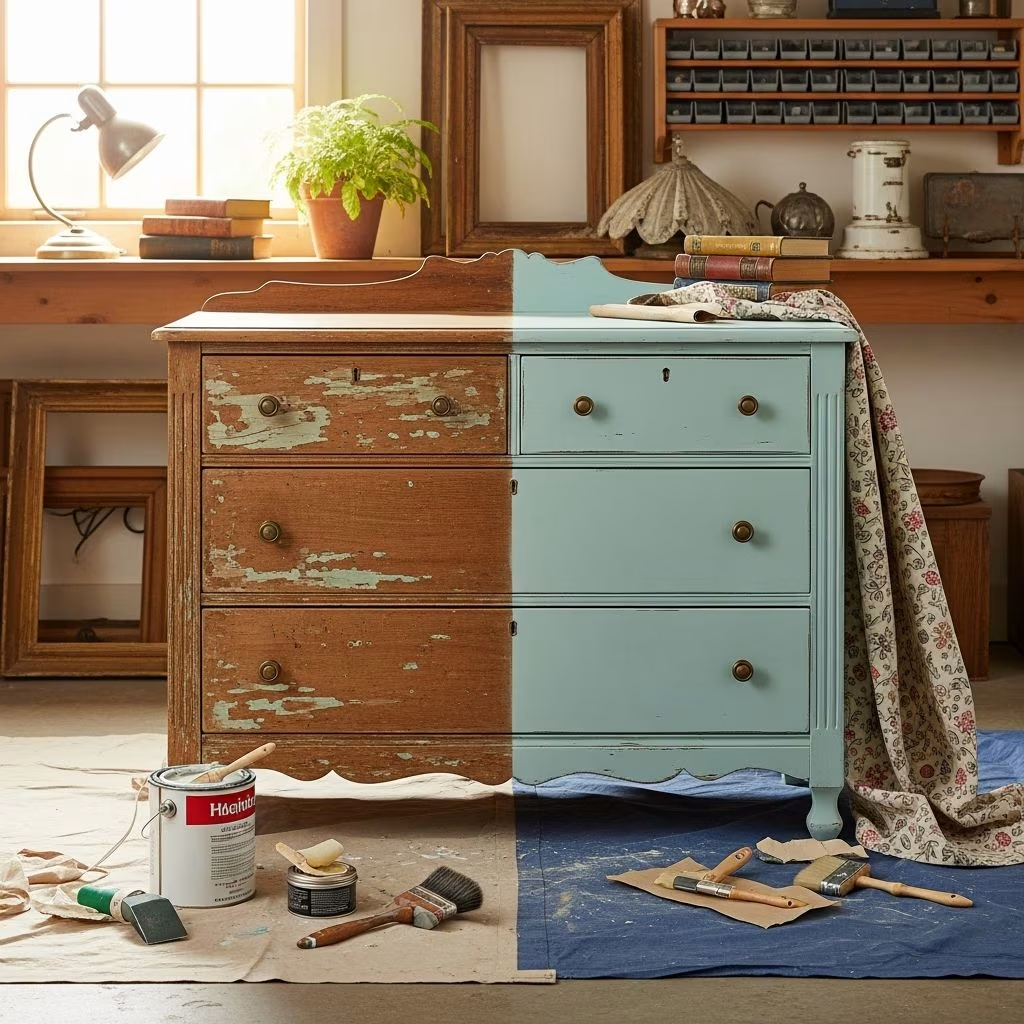
Rehabbing furniture is one of the most rewarding ways to save money while giving your home a fresh, personalized look. Instead of spending hundreds or thousands on new pieces from big-box stores, you can source free or low-cost items from thrift stores, garage sales, alleys, or even your own garage, then transform them with simple DIY techniques. This guide covers everything from basic cleaning and sanding to advanced upholstery and distressing, helping you create **custom furniture** that reflects your style without breaking the bank.
Whether you’re a beginner with basic tools or an experienced flipper, these tips will help you avoid common pitfalls and achieve professional results. You’ll learn how to assess pieces for potential, choose the right materials, and execute flips that increase both beauty and value. Let’s dive into the step-by-step process that turns **trash into treasure**.
Finding Your Next Rehab Project
The first step in any successful furniture rehab is sourcing the right piece. Look for solid wood furniture with good bones—avoid particle board or anything too damaged structurally. Great places to hunt include:
- Thrift stores and Goodwill: Items often priced under $50 with high rehab potential.
- Garage sales and yard sales: Negotiate for bundles or free pickups.
- Facebook Marketplace and Craigslist: Free curbside alerts are goldmines.
- Alleys and bulk trash days: Many gems are discarded simply because they need cosmetic updates.
Key signs of a winner: sturdy frame, real wood (not veneer), and minimal structural damage. Budget $0–$100 per piece to start, and aim for versatile items like dressers, chairs, nightstands, or coffee tables.
Tools and Supplies You’ll Need
Stock up on these essentials for most rehabs. Total investment: under $200 for a full kit.
| Category | Essentials | Estimated Cost |
|---|---|---|
| Prep Tools | Sander (orbital or mouse), sandpaper (80-220 grit), drop cloths, painter’s tape | $50–$100 |
| Cleaning | TSP substitute, steel wool, tack cloth, degreaser | $20 |
| Painting/Finishing | Brushes, rollers, sprayer (optional), primer, chalk paint, polycrylic topcoat | $50–$80 |
| Upholstery | Staple gun, fabric, foam, batting | $30 |
| Hardware | New knobs/pulls, wood filler, screws | $20 |
Pro tip: Start with multi-use items like chalk paint, which requires no sanding or priming on many surfaces.
Step 1: Deep Cleaning and Disassembly
Before any transformation, clean thoroughly to remove dirt, grime, and old finishes that prevent new paint from adhering.
- Disassemble: Remove drawers, hardware, and cushions. Label screws for reassembly.
- Clean: Mix TSP substitute with water, scrub with steel wool, rinse, and dry completely. For greasy pieces, use a degreaser like Krud Kutter.
- Inspect: Fill gouges with wood filler, let dry, then sand smooth.
This step takes time but ensures longevity—skipping it leads to peeling finishes.
Step 2: Sanding for a Smooth Base
Sanding removes old paint, smooths imperfections, and creates “tooth” for new finishes.
- Use 80-grit for heavy stripping, 120-150 for smoothing, 220 for final prep.
- Always sand with the grain to avoid scratches.
- For glossy finishes, degloss with liquid sandpaper first.
- Vacuum and wipe with tack cloth after each grit.
Time saver: For chalk paint or milk paint, light sanding suffices—no full strip needed.
Step 3: Priming and Painting
Primer seals the wood and blocks tannins (red stains from certain woods). Choose based on your topcoat:
- Oil-based primer: For high-traffic furniture.
- Kilz or Zinsser: Blocks stains effectively.
- Apply 1-2 thin coats, sand lightly between.
For painting:
- Chalk paint: Matte, distressed look; brands like Annie Sloan or Dixie Belle.
- Latex paint: Budget-friendly; add Floetrol for smooth roller application.
- Spray paint: For even coverage on curves; use in well-ventilated area.
Two thin coats beat one thick; dry 24 hours between.
Distressing for Vintage Charm
Distressing adds character, mimicking heirloom pieces.
- Paint base color, let cure 24+ hours.
- Sand edges, corners, and high-touch areas with 220-grit to reveal underlayers.
- Wax or topcoat to seal.
Advanced: Layer 2-3 colors, wet distress with water spray for natural wear.
Upholstering Like a Pro
Updating fabric breathes new life into chairs, sofas, and ottomans.
- Choose performance fabric: Stain-resistant, durable for families/pets.
- Tools: Pneumatic staple gun for speed.
- Process: Remove old fabric, replace foam if sagging (use high-density), cut new fabric 4-6″ larger, staple taut from center out.
Tufting tip: Use buttons and piping for luxury detail. Cost: $20–$50 per chair.
Hardware and Finishing Touches
Swap outdated knobs for modern brass, crystal, or ceramic pulls—under $2 each in bulk.
- Drill new holes if needed, fill old with putty.
- Topcoats: Polycrylic for water resistance, wax for sheen.
- Add legs with riser kits for mid-century vibe.
These details elevate a rehab from good to sellable.
Common Mistakes to Avoid
Steer clear of these pitfalls:
- Rushing prep: Always clean and sand properly.
- Wrong paint: Test on inconspicuous area.
- Poor ventilation: Fumes cause health issues.
- Skipping topcoat: Paint chips without protection.
Budget Breakdown: Rehab vs. Buy New
| Item | Rehab Cost | New Price | Savings |
|---|---|---|---|
| Dresser | $75 | $400 | $325 |
| Chair | $40 | $250 | $210 |
| Coffee Table | $30 | $200 | $170 |
Average savings: 70-80% per piece. Flip extras on Marketplace for profit!
Advanced Techniques: Decoupage and Gold Leaf
Elevate with:
- Decoupage: Mod Podge + napkins for floral motifs.
- Gold leaf: For accents on edges.
- Stenciling: Geometric patterns with chalk paint.
Frequently Asked Questions (FAQs)
What is the best paint for furniture rehab?
Chalk paint is ideal for beginners—no primer needed, distresses easily. Use latex with primer for durability.
How do I remove varnish without sanding?
Citristrip gel works wonders; apply, cover with plastic, scrape after 30 minutes.
Can I rehab particle board?
Limited success—paint lightly, avoid heavy sanding. Solid wood is best.
How long does a full rehab take?
4-8 hours hands-on, plus 2-3 days drying. Weekend project!
Is rehabbing furniture profitable?
Yes—flip for 3-5x cost. Dressers sell for $200-500 post-rehab.
Ready to start? Your first flip could save $300+. Share your before/afters in comments!
References
- Furniture Finishing Guide — U.S. Department of Agriculture, Forest Service. 2023-05-15. https://www.fpl.fs.usda.gov/documnts/fplgtr/fplgtr190.pdf
- Wood Finishing 101 — Fine Woodworking (Taunton Press). 2024-02-10. https://www.finewoodworking.com/project-guides/finishing
- Consumer Reports: Best Paints for Furniture — Consumer Reports. 2025-08-20. https://www.consumerreports.org/home-garden/paint/best-furniture-paints/
- DIY Upholstery Basics — Federal Trade Commission (Consumer Education). 2024-11-01. https://consumer.ftc.gov/articles/home-repair-upholstery-tips
- Thrift Economy Report — U.S. Bureau of Labor Statistics. 2025-06-30. https://www.bls.gov/opub/mlr/2025/article/thrift-retail-trends.htm
This article is general information, not personal financial advice. Consider your own situation, or speak with a licensed adviser, before acting on it.